|
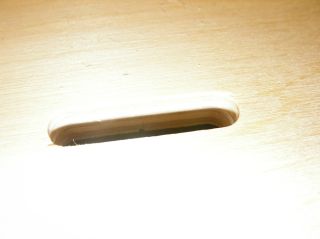
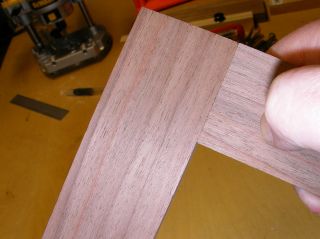
Last weekend (early April 2011), I was working on a walnut medicine cabinet using some beautiful straight-grained walnut I had found the previous weekend at my hardwood supplier. I was assembling the face frame with pocket screws when I heard a c-r-A-C-K. The 2nd to the last screw cracked the stile going in. Badly. It would be easier to start over than to fix the frame. I had enough wood left to make one more frame, so I used dowels to assemble it. I like dowels enough, but positioning the jig can be tedious (IMHO). I know others disagree, but having side to side play in the joint and then being able to align things during glue up, like a biscuit jointer or a Domino with an oversize (wide) cut takes a lot of the worry out of getting things perfect while cutting the joints. So a Domino would be ideal. But I didn't have one. The cracked walnut stile had me convinced I needed one, so I actually posted a wanted ad for a used Domino. I couldn't justify the $850 a new one costs. I've seen used ones go for $650. Still a lot of money to spend, but it seemed like it would allow me to join narrow pieces of stock in a fast and efficient manner. I figured that while watching for a used Domino, I'd investigate mortising jigs. I'd been thinking about making a mortising jig to use with my little DeWalt DW611 plunger. It has great dust collection. It plunges nicely. It seems like it would be the perfect candidate for a compact mortising jig. Many of the jig plans out there (Shop Notes, etc.) are for larger jigs. I wanted something smaller. Something I could "take to the wood," if desired. Something I could use at the bench (clamped) like a full-size jig, but also something that I could clamp to a large workpiece out of the driveway. I wanted flexibility! I also decided that using multiple floating tenons (like using multiple biscuits or multiple dowels or multiple Dominos) was preferred to adjusting the size of the mortise to the size of the stock. So for a face frame, I'd use a single 1" x 1-1/2" x 1/4" floating tenon. For attaching an apron to a leg, I might use two or four. I can produce my own "one-size-fits-all" tenons in advance and always have plenty on hand.
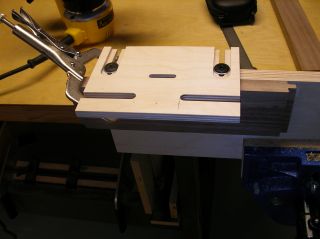
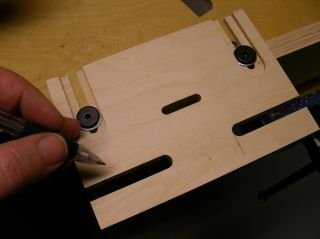
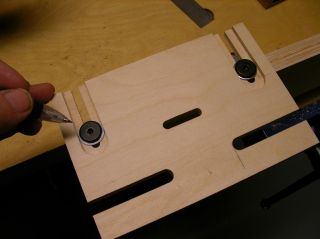
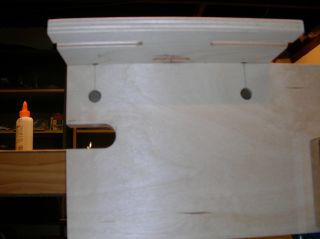
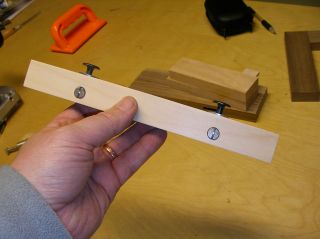
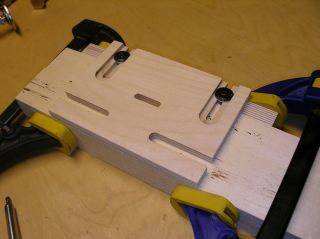
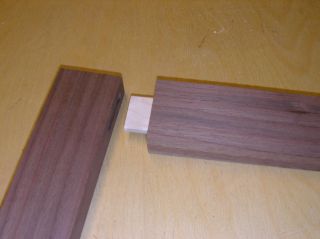
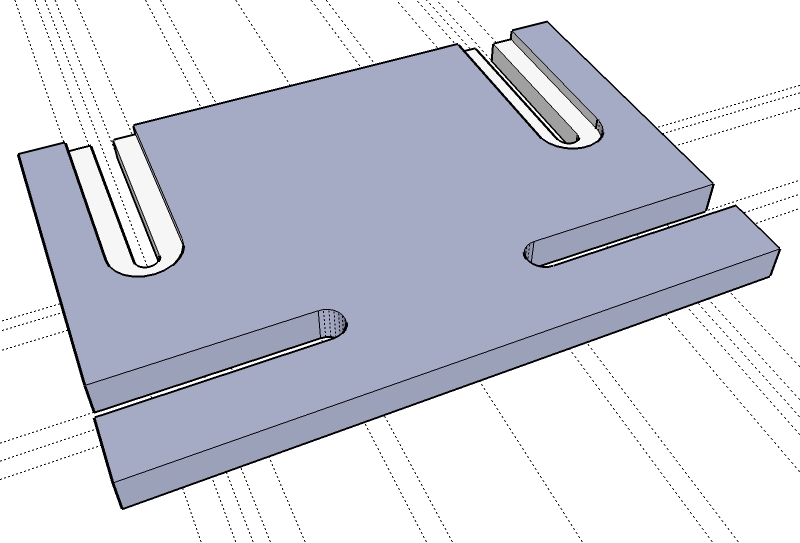
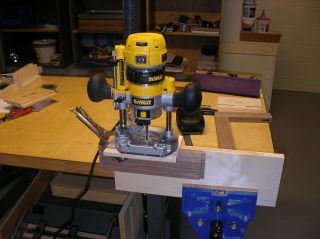
I routed a relief in the bottom of the template, hoping the dust could escape. That didn't help. So I enlarged the slot and used a larger bushing. Still no good. Looking at the bottom of the router, I decided my next attack would be to remove two of the screws for the plastic sub-base, and use longer screws with plastic spacers to create guides that would ride in 3/8" wide slots in a new template. Well, this worked even better than expected. With the bushing out of the picture, dust was properly evacuated from the mortise. And the 3/8" spacers I found at my local hardware store fit in a 3/8" wide slot cut by a router bit PERFECTLY. The router moves like it is on rails. The width of the mortise (1-1/8") is controlled by the center (non-wasted) part of the slot. As the 3/8" spacers I've attached to the bottom of the router reach the end of their slots, they stop the router from moving any further. For smaller workpieces, I prefer to use my template on a larger fence I clamp in my workbench vise. But I've also made a smaller fence that allows me to clamp the template directly to a larger workpiece (a table stretcher, for example). The edge-to-mortise distance is controlled by two screws (the black ones) that you see on top of the jig. I used knock-down furniture screws because they have large yet thin heads. They thread into cross-dowels in the fences. I purchased all the hardware at my local Ace Hardware. I was surprised when I assembled the first joint and saw just how nicely it fit together. There was just enough side-to-side play to align edges nicely during glue-ups, and yet the faces of the first and subsequent test pieces have been perfectly flush. I normally impress myself, but not THIS much. This design should be adaptable to many different types of routers. Anything that has holes for mounting a sub-base. I especially like the DW611, as it is nice and compact and easy to maneuver.
--Phil This page has been viewed 35091 times. |

 The
Thien Mortise Jig
The
Thien Mortise Jig